DISCLAIMER

The bike kinda builds itself,
all I do is put it together.

DISCLAIMER
The contents of this blog is a record of work carried out by the author and other third party information and pictures gleaned from various sources on the internet. It is published for academic interest and entertainment only. It is neither suggested or intended that any work or modifications shown here are to be carried out by any party reading the blog.

The Hitchcock Rigid Conversion

Mission Statement

This blog has been set up as a record of my attempt to build a cool Bobber style bike out of the Royal Enfield Bullet. With the cost of genuine early British and American bikes and parts spiralling upwards in the face of the current global economic climate, building a retro style custom is rapidly becoming cost prohibitive. Initially, there will be a period of accruing parts and information as the bike I intend to re-create is my daily rider.
I have heard so many horror stories about the Indian made Bullet from people who's mate used to have one, that I have lost count. All I can say is that I have covered over 20,000 miles on mine in the last three and a half years, and feel happy that it is quite capable of doing another 20.
So if you like the idea or just curious, you are welcome to come along for the ride.

Friday 30 September 2011

Well the sun has been belting down in the UK,so put a holiday in for today and it was off for a ride on the old Yamaha,320 miles blasting around our motorways.....sooooo hot

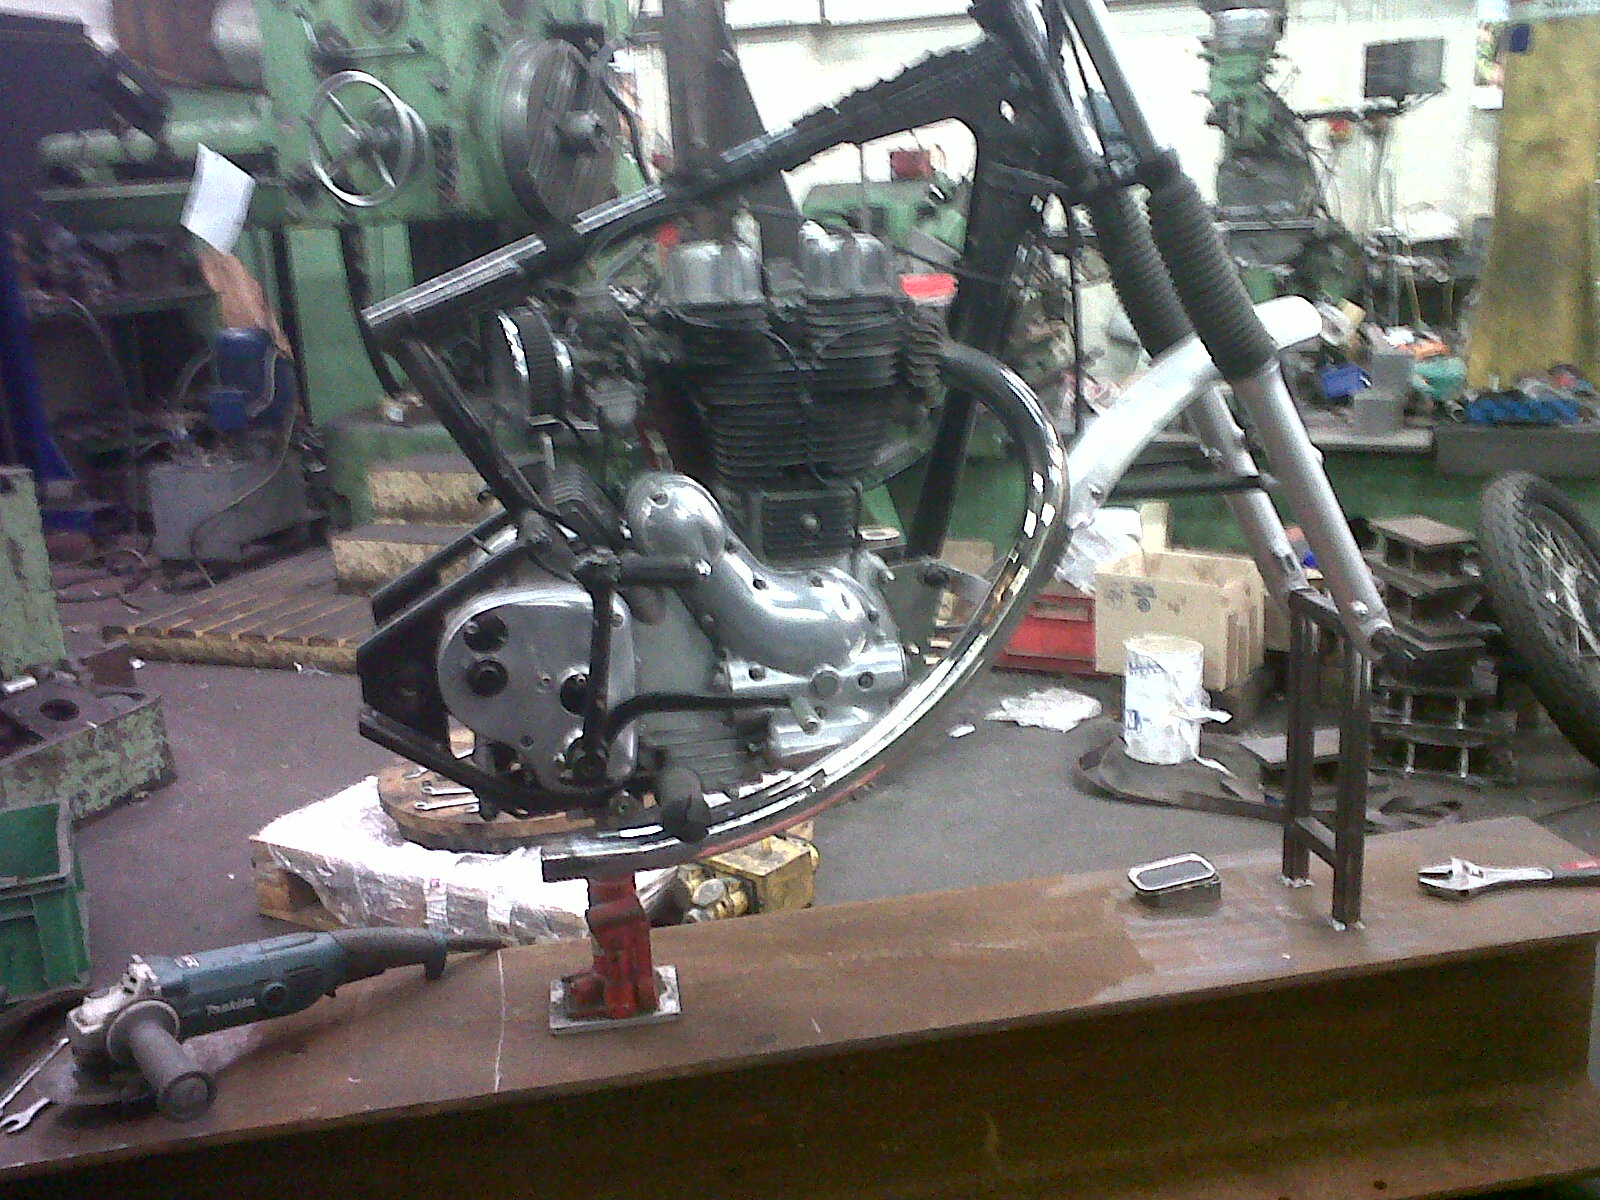
Wednesday 28 September 2011

More a case of frame off engine

big lump of iron came out today to finish the welding on the frame

thats what i like to see,a team of welders bizzy as bees on my bike

thats better to weld underneath the frame


all welded up,just a tidy up with the air linisher and it will look like it was ment to be like that from the factory.Tomorow cut all the brackets off and burn the paint off the frame

Monday 26 September 2011

a light light bracket

Well i had to do some real work today so only had a few spare moments on the Bullet,grafted a lump of S/S i had around into a light bracket.Fit and forget this i should be doing as much as i can in stainless.

needed a few bits off FleaBay,the bloke only lives 5 mile away so an email to him and went thru tonight and got them,save on postage and not a bad price off him
throttle cable
clutch cable
decoke gasket set
gear rubber
electronic ignition
£52

Saturday 24 September 2011

And its off the jig

need something better than a lump of wood to stop it falling over
head light on

Padock stand works a treat i made

Friday 23 September 2011

Nearly off the jig

just a little mess with the bike today,made some s/s spacers for the rear wheel to centre it,then i have to shave a bit off the hub to line the sprocket then its time to fit the tyre and get it rolling

tried the tank on to make sure it cleared the rocker covers,it is touching here but it will be mounted 1/2" further up


decided to make a paddock stand for when i am rolling it around,from what i can gather the bike will be stable on this

Thursday 22 September 2011

Back end build

front top tube welded in place
back plate in place then remove mock SA and an attack with mr makita again,cut and bend bottom rails ready for weld
there we go,pop the rear wheel in place and it looks like a bloody chopper
chain side just needs 10mm skimming off the hub to line the chain up
brake side looking good plenty of room to mess with,going to try and use a rod for the brake instead of a cable

Bill

Black is the new chrome

Front wheel in etch primer ready for lashings of 2k black
after lashings of 2k black
Black is the new chrome

Thursday 15 September 2011

Cut and thrust

Whats that for then???

I see,handy for lifting an Enfield up onto a welding jig!!!

Its MAKITA time,back end gone in the blink of an eye...

Front end in jig,not going anywere this...

Back end in jig with false swinging arm to line things up...


Now comes the hard bit,bend 2 top rails and mill the back of them to sit in rear wheel hanger...


Not to bad even if i say so myself..


Plenty to weld to,i need to cover this section with a plate to mount the tank and a rubber insulator...

Top rails ready to weld in place...

Bill

FOR SALE

ONE BOLT ON TRIKE FOR ENFIELD BULLET
SIX BOLTS AND ITS ON,KEEP ALL ORIGINAL BITS FROM YOUR BIKE.COMES WITH ELECTRICAL BOX AND EXHAUST

Bill

Wednesday 14 September 2011

Here goes nowt

LET THE FUN BEGIN.............

Tuesday 13 September 2011

Tanks done

Underside of the tank fully welded and a coat of etch primer

New cap and filler welded in and a layer of bodge to see were i am at

Front of the oil/lekky tank with a screw on lid

The rear of the tank welded on,not sure to leave the welds showing for that backyard look or to smooth them off???

Bill

Monday 12 September 2011

Sunday 11 September 2011

State of play report

After a bit of a bollocking from Bill and all the work he's putting in, thought it was best to give a bit of an update. Barry knocked up the battery tray that sits nicely in behind the gear box. Bolted through the engine plates by the rear frame bolts, it is stopped pivoting by a pin through the centre stand pivot hole.
The current state of play. The seat has come out a treat, apologies for not posting this when it first came back a few weeks ago. A new, well new to me, upholsterer about 5 miles away, great job and only took about three weeks. Probably going to run the rear muddie in a similar fashion, but may well get another guard.

Saturday 10 September 2011

Oil / Lekky tank

Decided to use the ally tank for the electrics to go in,pain in the ass stainless.So i have the main body now i need a lid.Chunk of ally in the mill and away we go

Machined a step all the way around to sit in the body,i will recess this for the ignition switch.

And there you go a perfect fit,not sure what to do on the other end,weld a plate in or anther cap,shall have to see what the access is like

Bill

Thursday 8 September 2011

Big hole in tank

out with the grinder and cut a bloody big hole in the tank

then out with the tin snips to start filling it in

there we go just need to fine tune the shape ready to weld
nice

when you look at the side of the tank it should look like the original seam

Bill